
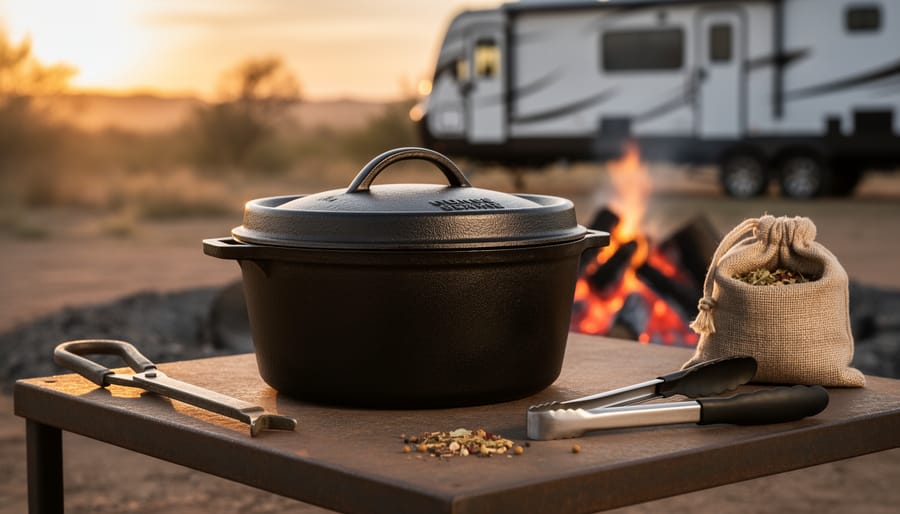
There’s nothing quite like watching the sunset over your campsite while a hearty one-pot meal bubbles away in your Dutch oven. Cast iron Dutch oven camping transforms RV trip cooking into something special, delivering restaurant-quality campfire dinners with surprisingly little effort. The secret? These heavy-duty pots distribute heat evenly, trap moisture beautifully, and can handle everything from breakfast cobblers to slow-cooked chili without needing constant attention.
After years of full-time travel and countless campfire meals with our family, we’ve learned that the best Dutch oven recipes share three things: minimal prep work, forgiving cook times, and ingredients that travel well. You don’t need culinary school training or a camp kitchen full of gadgets. What you do need is a 12-inch Dutch oven, a good bed of coals, and recipes designed to work when you’re miles from the nearest grocery store.
Whether you’re new to camping or simply want to expand your outdoor menu beyond hot dogs and s’mores, these tested recipes will have everyone asking for seconds while you relax by the fire.
What You’ll Need: Essential Dutch Oven Camping Gear
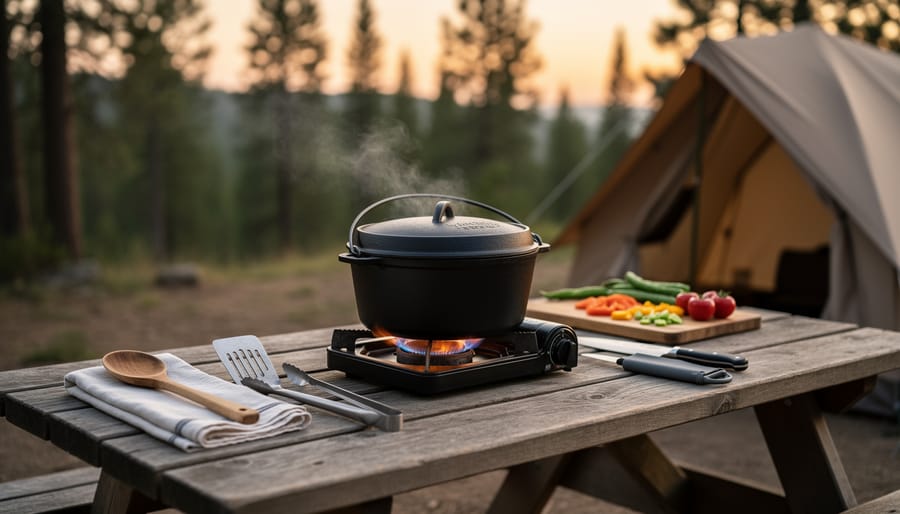
Getting started with Dutch oven camping doesn’t require a truck full of specialty equipment. You’ll need a handful of essential items, most of which you’ll use trip after trip once you discover how versatile this cooking method really is.
The star of the show is the Dutch oven itself. For family camping, a 10-inch or 12-inch cast iron Dutch oven hits the sweet spot. A 10-inch model feeds four to six people comfortably, while a 12-inch can handle larger families or groups. Look for one with three short legs on the bottom (these keep it stable over coals) and a flanged lid that holds coals on top. Cast iron is ideal for outdoor cooking because it distributes heat evenly, holds temperature remarkably well, and can take direct contact with fire and coals without damage.
Beyond the pot, here’s what you’ll want to pack:
- Heat source: charcoal briquettes or hardwood coals from your campfire
- Heat-resistant gloves or welding gloves to protect your hands from scorching metal
- Lid lifter tool designed for Dutch ovens (a must-have for safely removing the hot lid)
- Long-handled tongs for moving and arranging hot coals
- Charcoal chimney starter if using briquettes (makes lighting them much easier)
- Small metal shovel or ash scoop for managing coals
Optional gear that makes life easier includes a tripod for hanging your Dutch oven over a fire, a sturdy camp table to keep your cooking surface level, and a lid stand to rest the hot lid on while you check your food. A wire brush helps with cleanup, and parchment paper liners can reduce stuck-on messes for certain recipes.
The beauty of this setup is that it’s mostly one-time purchases. Once you have your Dutch oven and tools, you’re ready for countless camping meals with minimal additional investment.
Safety Tips Before You Start Cooking
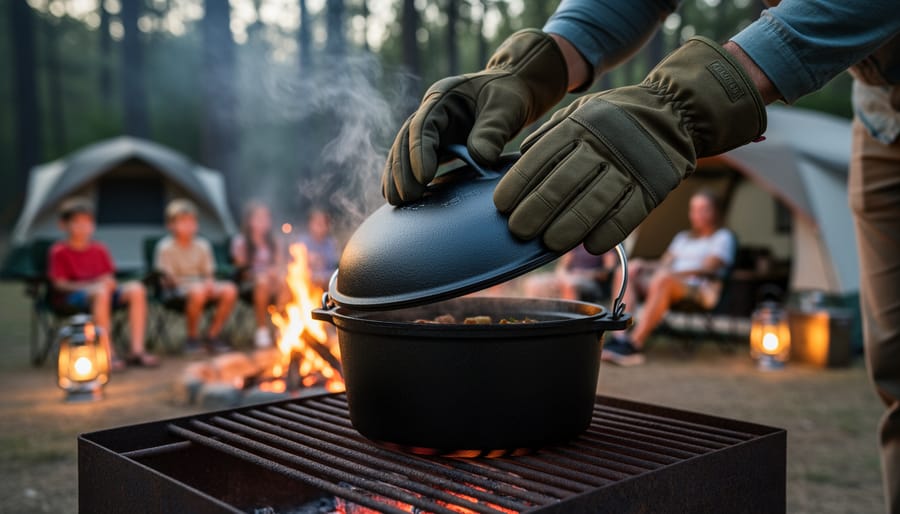
Before you light that first campfire and start cooking, let’s talk about keeping everyone safe. Dutch oven camping is incredibly rewarding, but cast iron gets scorching hot and stays that way for a long time, much longer than a typical pot at home.
First, fire safety is non-negotiable. Check your campground’s specific rules before you arrive, since some sites restrict open fires during dry seasons or require fire rings. Always cook on a stable, level surface away from your tent, awning, and anything flammable. Keep a bucket of water or sand nearby, and never leave hot coals unattended.
Speaking of keeping kids safe, we learned early on to set a visible boundary (a circle of rocks works great) around our cooking area. Kids are naturally curious, and they’ll want to help or peek inside. Assign them tasks at a safe distance, like preparing ingredients at the picnic table, and explain that the Dutch oven stays off-limits until an adult says it’s cool enough.
Proper ventilation matters more than you’d think. Cook outdoors in open air, not inside your RV or under a closed canopy, since burning charcoal produces carbon monoxide. If you’re cooking in light rain, a pop-up canopy with open sides works fine.
Finally, maintain your Dutch oven between trips. A well-seasoned surface not only seasoning prevents rust but also creates a natural non-stick layer that makes cleanup easier. After each use, dry it thoroughly and apply a thin coat of cooking oil before storing.
How Dutch Oven Cooking Works at Camp
Dutch oven cooking flips the script on what you’re used to at home. Instead of heat coming from a single burner underneath or an oven surrounding your pot, you’re working with coals both below and on top of the lid. This dual-heat approach creates an oven-like environment that bakes, roasts, and simmers food evenly, exactly what you need when you’re cooking outdoors without a kitchen.
Temperature control sounds complicated, but it’s actually pretty straightforward once you get the hang of it. Most recipes use a simple briquette formula: for a 12-inch Dutch oven at 350°F, you’d place about 8 coals underneath and 17 on the lid. Want it hotter? Add a few more. Cooler? Remove some. The cast iron holds and distributes heat so well that you don’t need to obsess over exact temperatures the way you might with a home oven.
Cooking times run a bit longer than stovetop methods, but here’s the beautiful part: Dutch ovens are incredibly forgiving. The thick walls and tight-fitting lid trap moisture and heat, which means your food stays tender even if you leave it cooking a little longer than planned. It’s hard to mess up badly, making this method ideal for camping when you’re juggling campfire management, kids, and maybe a hike you squeezed in beforehand.
You’ll peek in occasionally rather than constantly stirring, which frees you up to actually enjoy being outdoors instead of hovering over dinner.
Step-by-Step: Making Your First Dutch Oven Camping Meal
Let’s walk through your first Dutch oven meal using a simple one-pot chili that’s forgiving for beginners and always a hit with families. This recipe works whether you’re using charcoal briquettes or a campfire with hot coals.
Start by getting your heat source ready about 30 minutes before you want to cook. If you’re using charcoal briquettes, light 25-30 of them in a chimney starter. For campfire cooking, let your fire burn down until you have a good bed of glowing coals with minimal flames. You want steady, even heat, not roaring fire.
While your coals heat up, prep your ingredients at the picnic table. Brown your ground beef in a skillet over your camp stove if you have one, or you can brown it directly in the Dutch oven before adding other ingredients. Dice an onion, open your cans of beans and tomatoes, and measure out your chili powder and cumin. Having everything ready makes the actual cooking smooth and stress-free, much like other campfire recipes you might already love.
- Place 8-10 hot coals in a ring on the ground or fire pit, creating a stable base for your Dutch oven to sit on.
- Set your Dutch oven on the coals and let it preheat for about 5 minutes with the lid on.
- Add your browned beef, onions, beans, tomatoes, and spices to the pot, stirring everything together.
- Put the lid on and arrange 15-17 coals evenly across the top. This 8-bottom, 15-top arrangement gives you roughly 325°F.
- Let it cook for 45 minutes without lifting the lid. Resist the temptation to peek, you lose heat every time.
- After 45 minutes, carefully lift the lid with your lid lifter and stir. Check if the chili is bubbling and the flavors have melded.
- Replace the lid for another 15 minutes if needed, or remove from heat if it looks done.
Managing heat is simpler than you think. If your coals are dying down, add 2-3 fresh ones to the top and bottom. If things are cooking too fast, remove a few coals from the top.
When your chili is bubbling gently and smells incredible, use your heat-resistant gloves and lid lifter to remove it from the coals. Set it on a heat-safe surface like a camp table with a trivet, and let it rest for 5 minutes before serving. This approach works for countless easy camping meals beyond chili, the technique stays the same, only the ingredients change.
5 Foolproof Easy Dutch Oven Recipes for Camping Families
Campfire Breakfast Casserole
Start this breakfast casserole the night before by browning a pound of breakfast sausage at home and storing it in a cooler. At camp, dice four medium potatoes into small cubes and layer them in your greased Dutch oven. Add the cooked sausage, then whisk together eight eggs with a half-cup of milk and pour over everything. Top with shredded cheddar cheese. Place 8-10 coals underneath and 14-16 on top, then let it cook for 35-40 minutes until the eggs are set and the potatoes are tender. This feeds six hungry campers and reheats beautifully for stragglers who sleep in.
One-Pot Spaghetti and Meatballs
This recipe turns skeptical kids into Dutch oven fans. Toss frozen meatballs, dry spaghetti noodles broken in half, a jar of marinara sauce, and three cups of water directly into your preheated Dutch oven. No need to cook the pasta separately or brown the meatballs first, everything cooks together in about 30 minutes with 8 coals underneath and 16 on top. Stir once halfway through to prevent sticking, then check that the pasta is tender and the meatballs reach 165°F inside. Top with shredded mozzarella during the last five minutes, let it melt with the lid on, and you’ve got a crowd-pleasing dinner with almost zero cleanup.
Hearty Campfire Chili
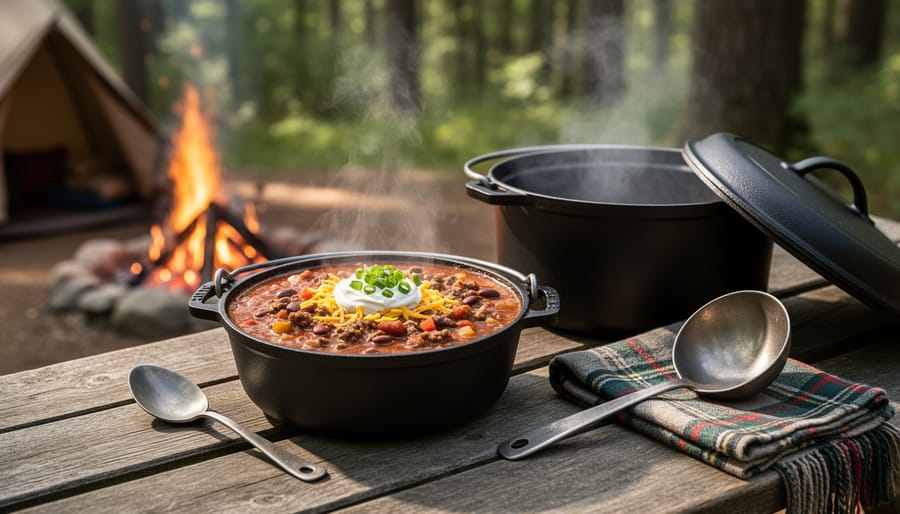
This crowd-pleaser practically cooks itself while you set up camp or explore nearby trails. Brown a pound of ground beef directly in your preheated Dutch oven, then add canned beans (kidney and black work great), diced tomatoes, tomato sauce, onions, and your favorite chili seasoning. Stir everything together, cover with the lid, and let it simmer over moderate heat, about 8 to 10 coals underneath and 12 to 15 on top, for 45 minutes to an hour. The longer it bubbles gently, the better the flavors meld. It’s nearly impossible to overcook chili in a Dutch oven, making this ideal for beginners. Serve with shredded cheese, sour cream, and cornbread for a satisfying meal that tastes even better the next day as leftovers.
Peach Cobbler Dessert
This crowd-pleaser uses just three main ingredients: two cans of sliced peaches (drained), one box of yellow cake mix, and half a cup of melted butter. Layer the peaches in your greased Dutch oven, sprinkle the dry cake mix evenly over the top, then drizzle the melted butter across the surface. Don’t stir, the magic happens as it bakes. Place 8 coals underneath and 16 on the lid, and let it cook for 35-40 minutes until the top turns golden brown and smells incredible. The cake mix forms a crispy crust while the peaches bubble underneath. Kids love this one, and cleanup is minimal since the fruit provides its own moisture. Serve warm with a scoop of vanilla ice cream if you’re feeling fancy.
Cheesy Pull-Apart Bread
This crowd-pleaser transforms a tube of refrigerated biscuit dough into addictive cheesy bread that disappears in minutes. Cut each biscuit into quarters, toss them with melted butter, shredded cheddar, garlic powder, and Italian seasoning, then pile everything into your greased Dutch oven. Cook with 8-10 coals underneath and 14-16 on top for about 25 minutes until the top turns golden brown and the biscuits puff up. Kids love pulling apart the gooey sections, and you can customize with mozzarella, parmesan, or bacon bits. The best part? Prep takes under five minutes, and there’s rarely any left over to clean up.
How to Tell When Your Meal Is Done (and What to Do If It’s Not)
Knowing when your Dutch oven meal is ready without lifting the lid every five minutes takes practice, but a few reliable cues make it easier. For most recipes, start checking about ten minutes before the expected finish time. Look for steam escaping from around the lid’s edge, which tells you liquid is still active inside. Listen for the sounds too: a gentle bubbling or simmering indicates steady cooking, while complete silence might mean your heat has dropped too low.
For meat-based dishes like chili or casseroles, use an instant-read thermometer if you have one (poultry should hit 165°F, ground beef 160°F). Insert it quickly through a crack in the lid rather than removing the entire top. With baked goods like cobbler or pull-apart bread, you’re looking for a golden-brown top and firm texture when you gently press the center. If the top is browning too fast but the inside feels soft, move a few coals from the lid to the bottom to redirect heat.
When something is clearly undercooked at the expected finish time, add 5-10 more briquettes and give it another 15-20 minutes. If you smell burning or see black smoke curling from the lid, immediately remove some coals from both top and bottom, let it cool slightly, then check for damage. Scorched bottoms happen, but they’re usually salvageable if you catch them early. Once you’ve made a few meals, you’ll develop an instinct for timing and heat, making each camping dinner smoother than the last. Store your now-seasoned Dutch oven using family-friendly RV storage methods that keep it dry and ready for your next adventure.
Cleanup and Care at the Campsite
After your family finishes that last bite of cobbler, resist the urge to dunk your hot Dutch oven in the creek. Let it cool for at least 20 minutes before handling, even with gloves.
Once it’s safe to touch, scrape out food scraps with a plastic spatula. For most cleanup, hot water and a stiff brush work perfectly. The old rule about never using soap isn’t absolute anymore, modern dish soap won’t strip seasoning like harsh detergents did decades ago. If your pot has baked-on cheese or sticky residue, a small squirt of soap and some elbow grease won’t hurt. Just don’t soak it overnight.
Stubborn bits? Pour in an inch of water, bring it to a simmer over your remaining coals, and the stuck food will release easily. Scrape again, then rinse.
Dry your Dutch oven completely over low heat or by the fire. Any moisture left behind invites rust, especially in humid camping conditions. Once dry, rub a thin layer of cooking oil on all surfaces, including the lid.
For RV storage, nest the lid upside-down inside the pot with a paper towel between them to allow air circulation. This prevents musty odors and protects your seasoning until your next campfire meal.
Common Questions About Dutch Oven Camping
The best way to answer your Dutch oven questions is with straight, practical advice from real camping experience. These are the scenarios families ask about most when they’re starting out with outdoor cooking.
Can you use a Dutch oven on a camp stove?
Yes, but only if your stove can handle the weight and your Dutch oven has a flat bottom without legs. Most two-burner camp stoves work fine for simmering and braising, though you won’t get the all-around heat that coals provide.
How many briquettes do I need for different temperatures?
A simple formula works for most 12-inch ovens: for 325°F, use about 25 briquettes (9 underneath, 16 on top). Add or subtract 3-4 briquettes for every 25-degree change you want.
Can I prep ingredients ahead of time?
Absolutely, and it makes camping meals so much easier. Chop vegetables, measure spices, and brown meat at home, then store everything in containers or bags in your cooler until you’re ready to cook.
What if it rains while I’m cooking?
Rain isn’t a dealbreaker. Set up under your RV awning or a tarp, and add a few extra coals since moisture cools things down. Just keep the lid on to protect your food from rainwater.
One question that surprises people: you can absolutely use the same Dutch oven at home and at camp. There’s no need to buy a separate camping-only pot. The cast iron Dutch oven sitting in your kitchen cabinet right now works perfectly over coals, as long as it has an oven-safe lid. Some families prefer the traditional camping style with three legs and a flanged lid for stacking coals, but it’s not required. If you’re investing in your first Dutch oven specifically for camping, look for one with those features since they make outdoor cooking a bit easier. Either way, the cooking process stays the same.
Dutch oven cooking turns camping meals into something your family will remember long after the trip ends. I still think about the cobbler we made on our first attempt, golden, bubbling, and somehow perfectly cooked despite our nervousness about managing the coals. That success gave us the confidence to try more ambitious recipes, and now Dutch oven nights are what my kids request most when we plan your RV trip.
Pick one recipe from this guide for your next camping adventure. You don’t need to master everything at once, just light your coals, follow the steps, and enjoy the process. The beauty of Dutch oven cooking is that it’s hard to mess up, and even imperfect results taste amazing outdoors. For more ways to simplify your camping kitchen, browse our collection of easy camping recipes designed specifically for families on the road.